Amazon SageMaker Data Wrangler reduces the time it takes to aggregate and prepare data for machine learning (ML) from weeks to minutes in Amazon SageMaker Studio. Data Wrangler enables you to access data from a wide variety of popular sources (Amazon S3, Amazon Athena, Amazon Redshift, Amazon EMR and Snowflake) and over 40 other third-party sources. Starting today, you can connect to Amazon EMR Hive as a big data query engine to bring in large datasets for ML.
Aggregating and preparing large amounts of data is a critical part of ML workflow. Data scientists and data engineers use Apache Spark, Apache Hive, and Presto running on Amazon EMR for large-scale data processing. This blog post will go through how data professionals may use SageMaker Data Wrangler’s visual interface to locate and connect to existing Amazon EMR clusters with Hive endpoints. To get ready for modeling or reporting, they can visually analyze the database, tables, schema, and author Hive queries to create the ML dataset. Then, they can quickly profile data using Data Wrangler visual interface to evaluate data quality, spot anomalies and missing or incorrect data, and get advice on how to deal with these problems. They can leverage more popular and ML-powered built-in analyses and 300+ built-in transformations supported by Spark to analyze, clean, and engineer features without writing a single line of code. Finally, they can also train and deploy models with SageMaker Autopilot, schedule jobs, or operationalize data preparation in a SageMaker Pipeline from Data Wrangler’s visual interface.
Solution overview
With SageMaker Studio setups, data professionals can quickly identify and connect to existing EMR clusters. In addition, data professionals can discover EMR clusters from SageMaker Studio using predefined templates on demand in just a few clicks. Customers can use SageMaker Studio universal notebook and write code in Apache Spark, Hive, Presto or PySpark to perform data preparation at scale. However, not all data professionals are familiar with writing Spark code to prepare data because there is a steep learning curve involved. They can now quickly and simply connect to Amazon EMR without writing a single line of code, thanks to Amazon EMR being a data source for Amazon SageMaker Data Wrangler.
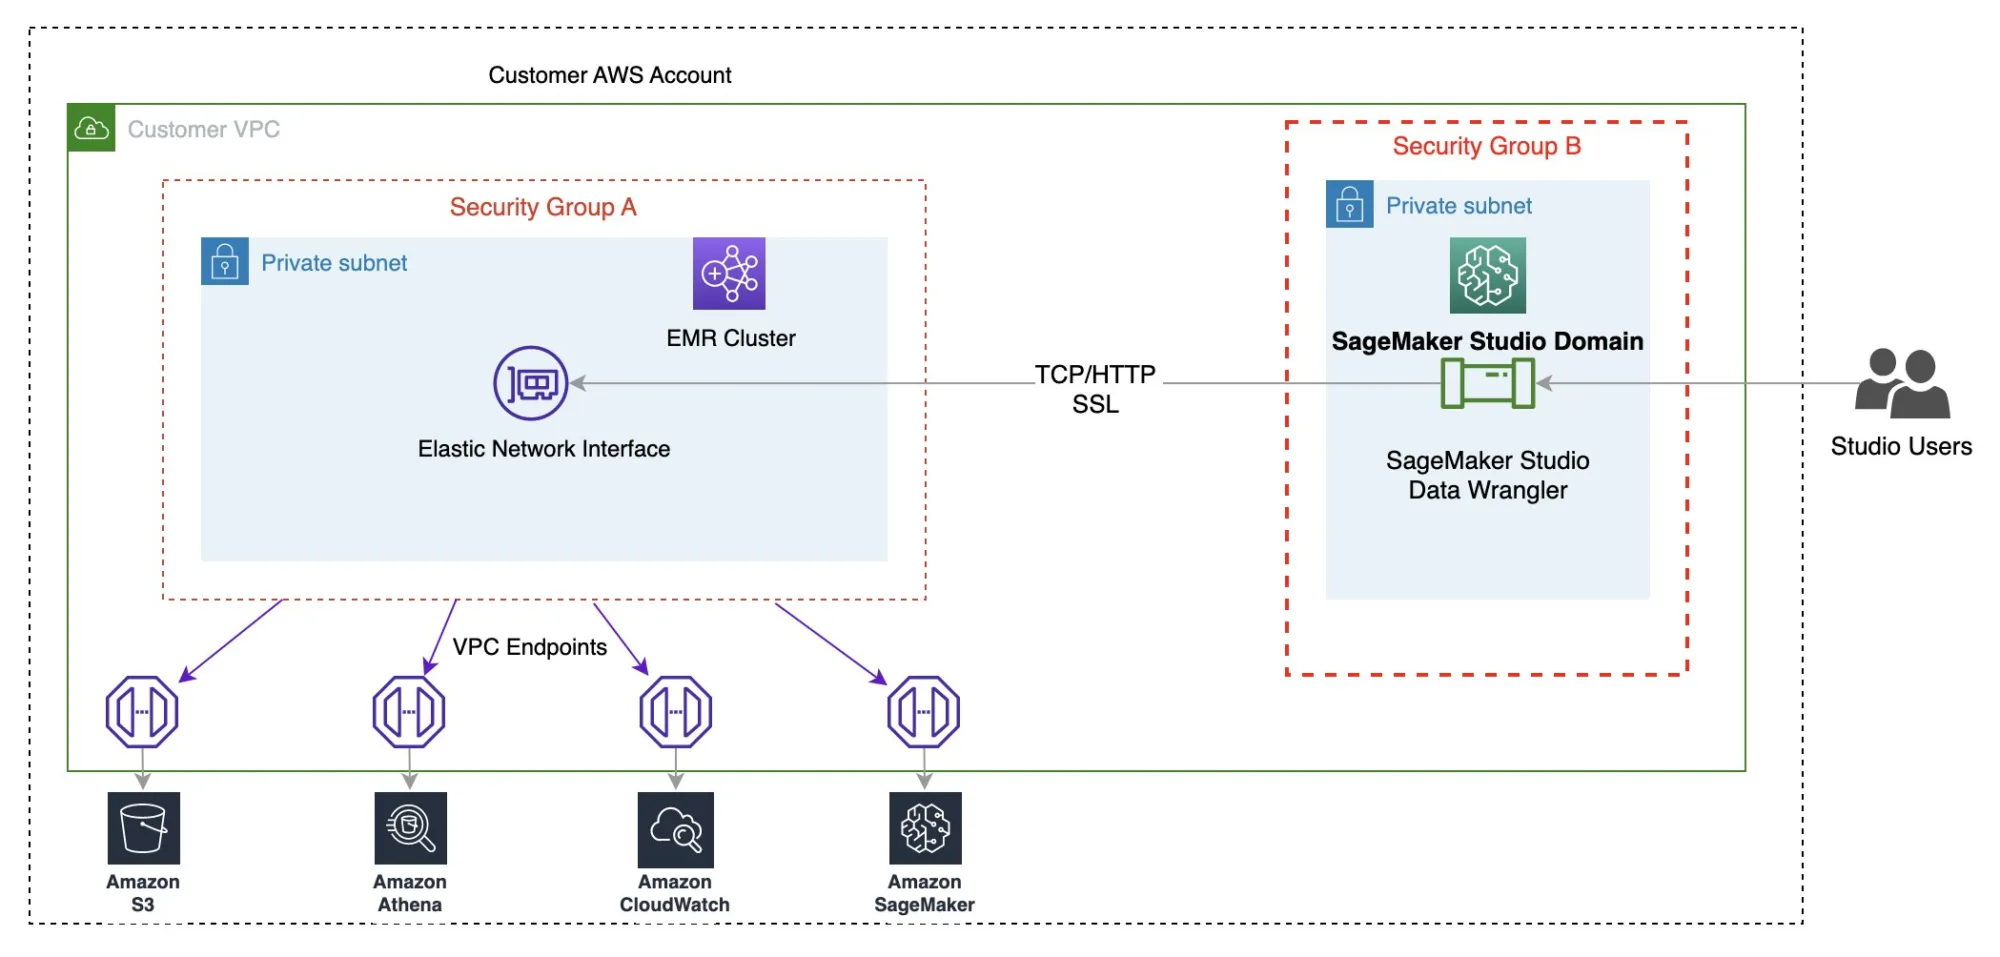
The following diagram represents the different components used in this solution.
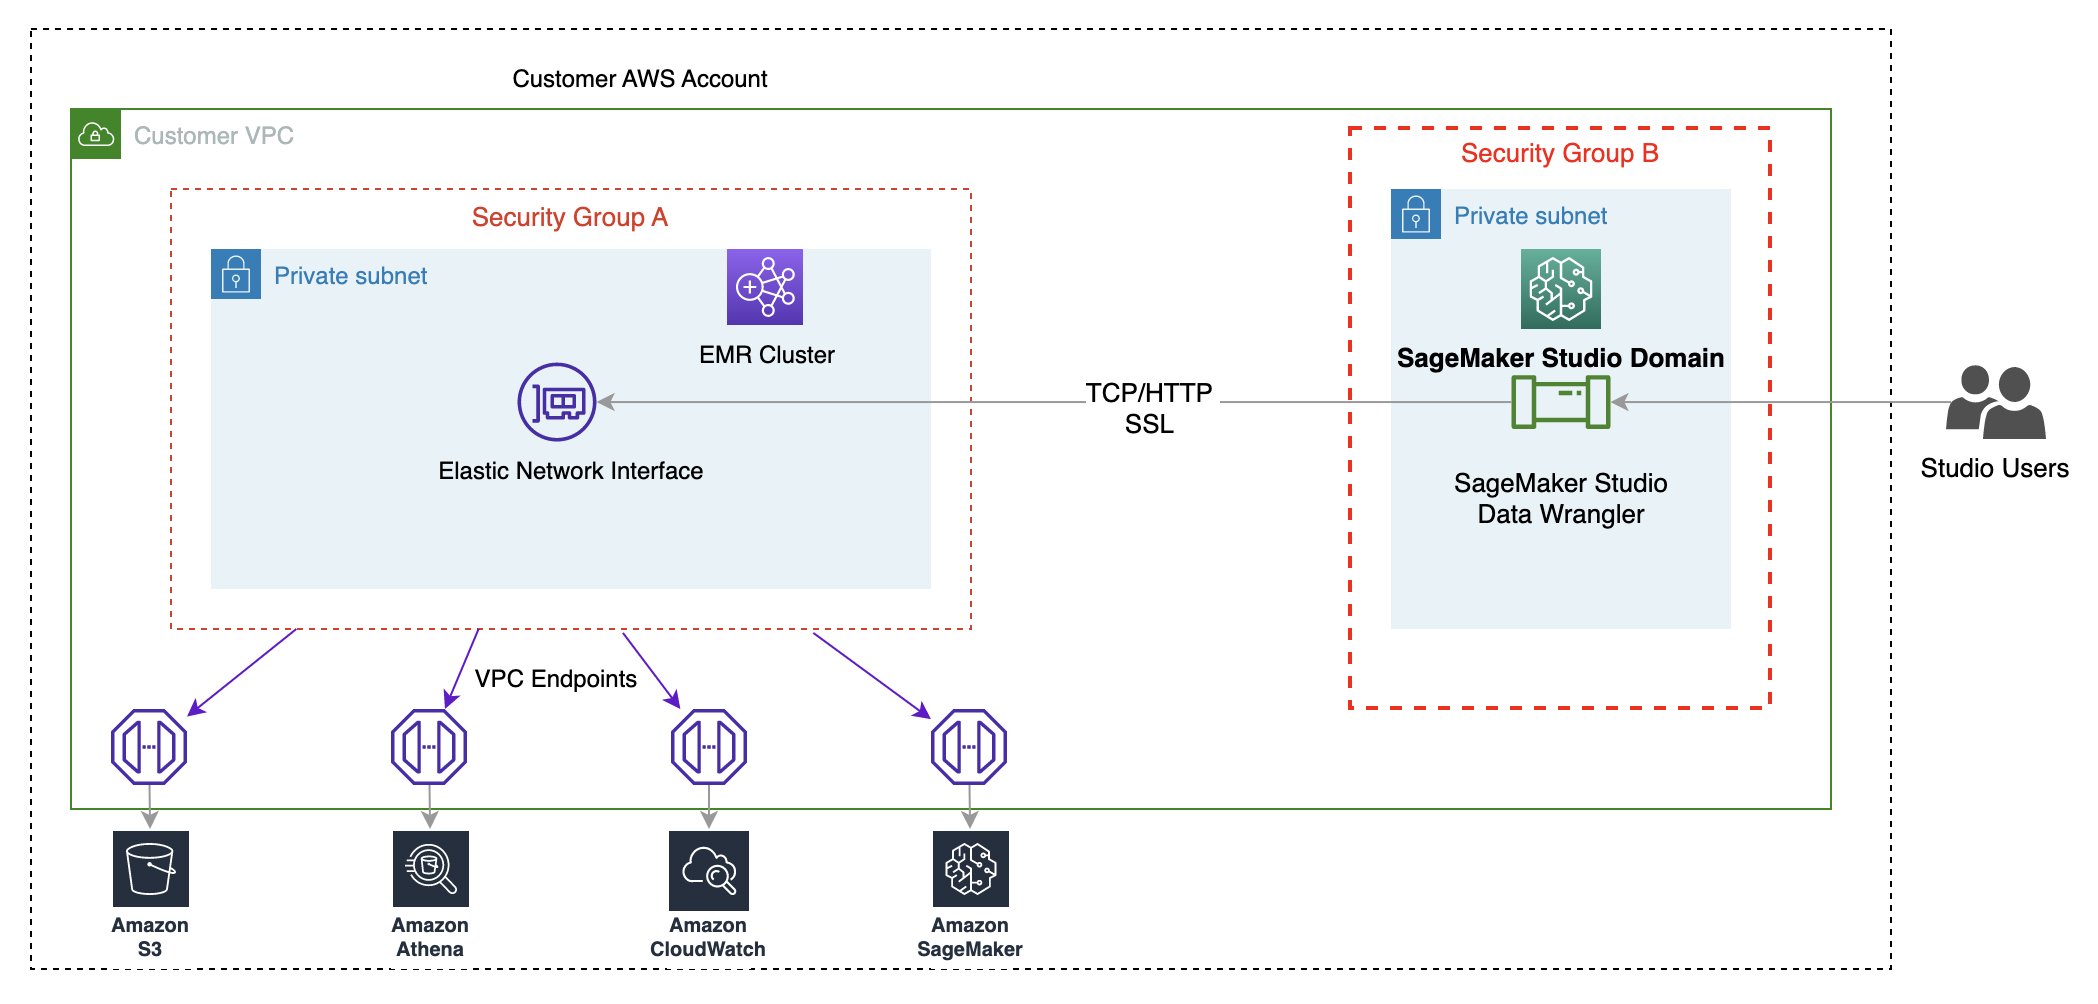
We demonstrate two authentication options that can be used to establish a connection to the EMR cluster. For each option, we deploy a unique stack of AWS CloudFormation templates.
The CloudFormation template performs the following actions when each option is selected:
- Creates a Studio Domain in VPC-only mode, along with a user profile named
studio-user. - Creates building blocks, including the VPC, endpoints, subnets, security groups, EMR cluster, and other required resources to successfully run the examples.
- For the EMR cluster, connects the AWS Glue Data Catalog as metastore for EMR Hive and Presto, creates a Hive table in EMR, and fills it with data from a US airport dataset.
- For the LDAP CloudFormation template, creates an Amazon Elastic Compute Cloud (Amazon EC2) instance to host the LDAP server to authenticate the Hive and Presto LDAP user.
Option 1: Lightweight Access Directory Protocol
For the LDAP authentication CloudFormation template, we provision an Amazon EC2 instance with an LDAP server and configure the EMR cluster to use this server for authentication. This is TLS enabled.
Option 2: No-Auth
In the No-Auth authentication CloudFormation template, we use a standard EMR cluster with no authentication enabled.
Deploy the resources with AWS CloudFormation
Complete the following steps to deploy the environment:
- Sign in to the AWS Management Console as an AWS Identity and Access Management (IAM) user, preferably an admin user.
- Choose Launch Stack to launch the CloudFormation template for the appropriate authentication scenario. Make sure the Region used to deploy the CloudFormation stack has no existing Studio Domain. If you already have a Studio Domain in a Region, you may choose a different Region.
LDAP 
No Auth - Choose Next.
- For Stack name, enter a name for the stack (for example,
dw-emr-hive-blog). - Leave the other values as default.
- To continue, choose Next from the stack details page and stack options.
The LDAP stack uses the following credentials.- username:
david - password:
welcome123
- username:
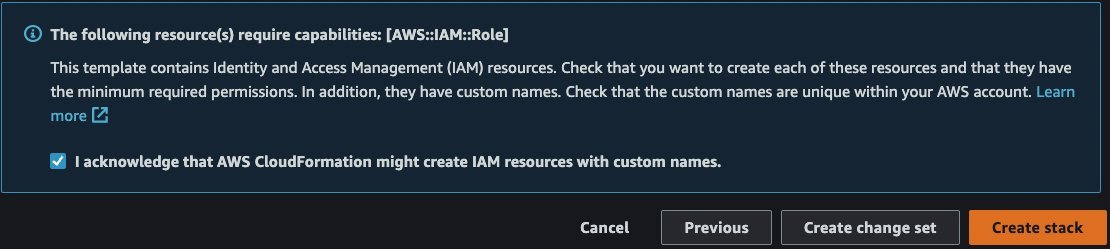
- On the review page, select the check box to confirm that AWS CloudFormation might create resources.
- Choose Create stack. Wait until the status of the stack changes from
CREATE_IN_PROGRESStoCREATE_COMPLETE. The process usually takes 10–15 minutes.
Set up the Amazon EMR as a data source in Data Wrangler
In this section, we cover connecting to the existing Amazon EMR cluster created through the CloudFormation template as a data source in Data Wrangler.
Create a new data flow
To create your data flow, complete the following steps:
- On the SageMaker console, click Domains, then click on StudioDomain created by running above CloudFormation template.
- Select studio-user user profile and launch Studio.

- Choose Open studio.
- In the Studio Home console, choose Import & prepare data visually. Alternatively, on the File dropdown, choose New, then choose Data Wrangler Flow.
- Creating a new flow can take a few minutes. After the flow has been created, you see the Import data page.

- Add Amazon EMR as a data source in Data Wrangler. On the Add data source menu, choose Amazon EMR.


You can browse all the EMR clusters that your Studio execution role has permissions to see. You have two options to connect to a cluster; one is through interactive UI, and the other is to first create a secret using AWS Secrets Manager with JDBC URL, including EMR cluster information, and then provide the stored AWS secret ARN in the UI to connect to Hive. In this blog, we follow the first option.
- Select one of the following clusters that you want to use. Click on Next, and select endpoints.

- Select Hive, connect to Amazon EMR, create a name to identify your connection, and click Next.

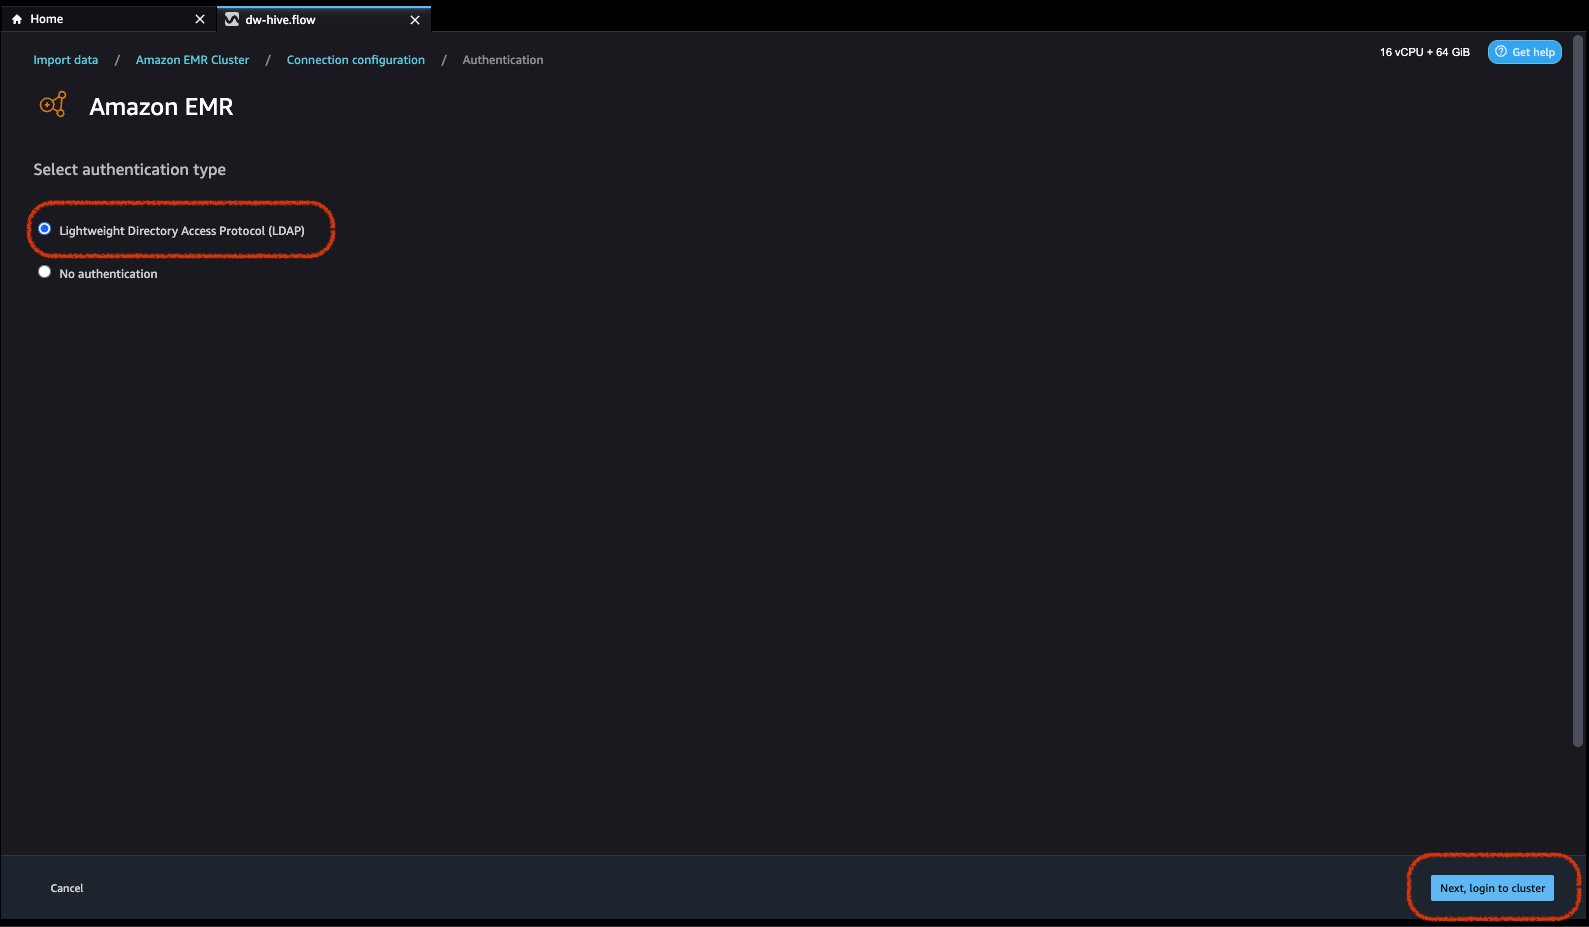
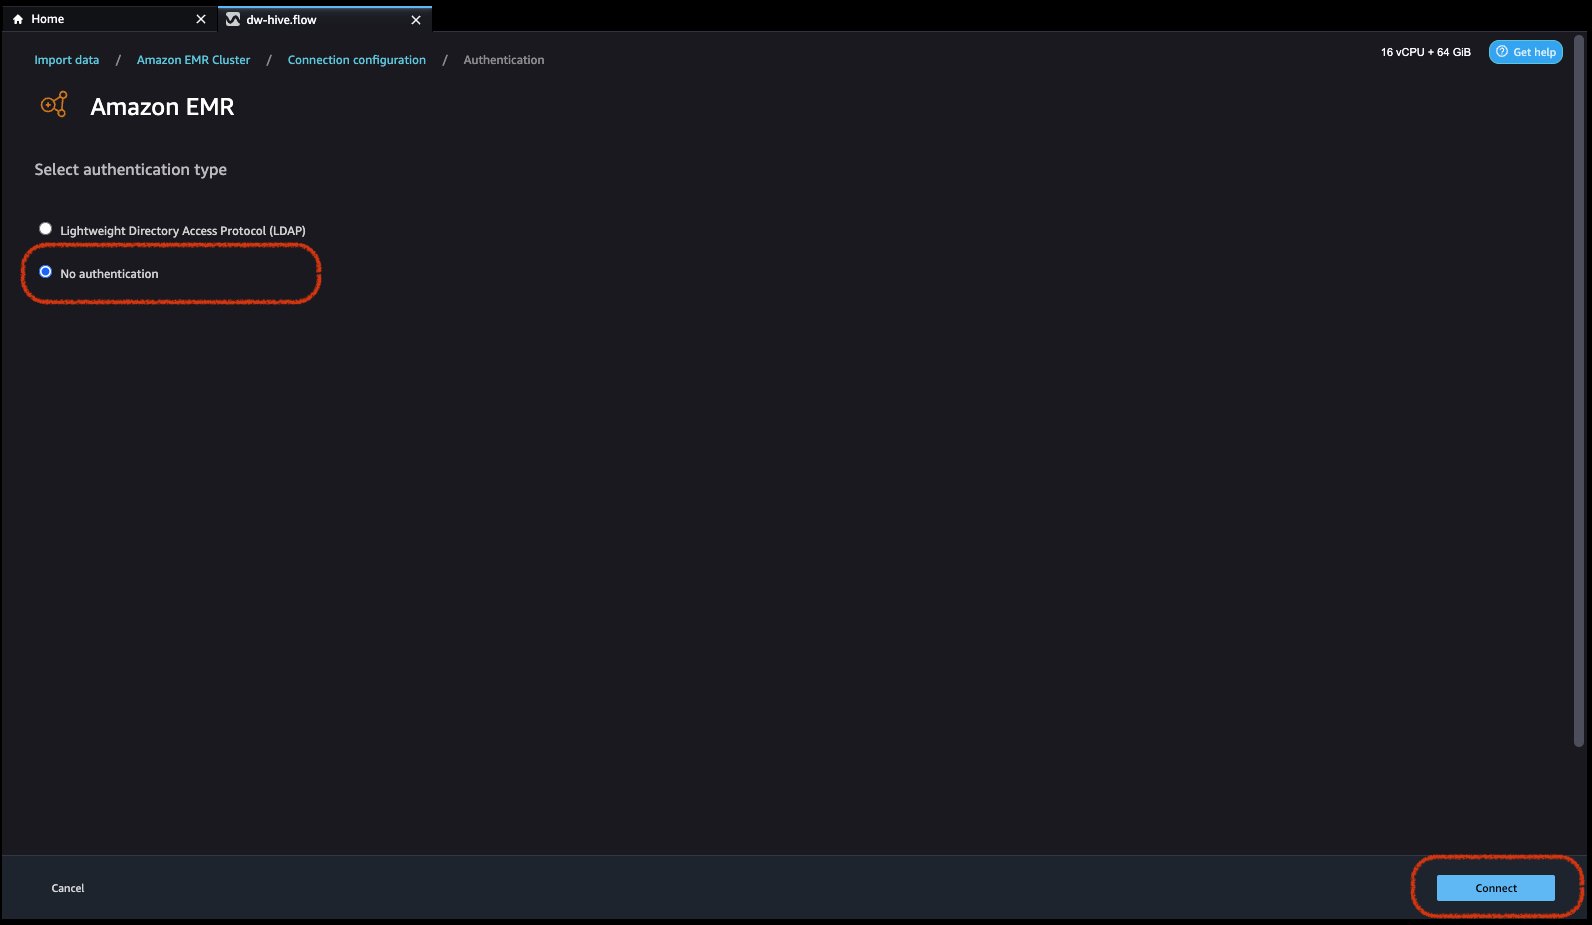
- Select authentication type, either Lightweight Directory Access Protocol (LDAP) or No authentication.


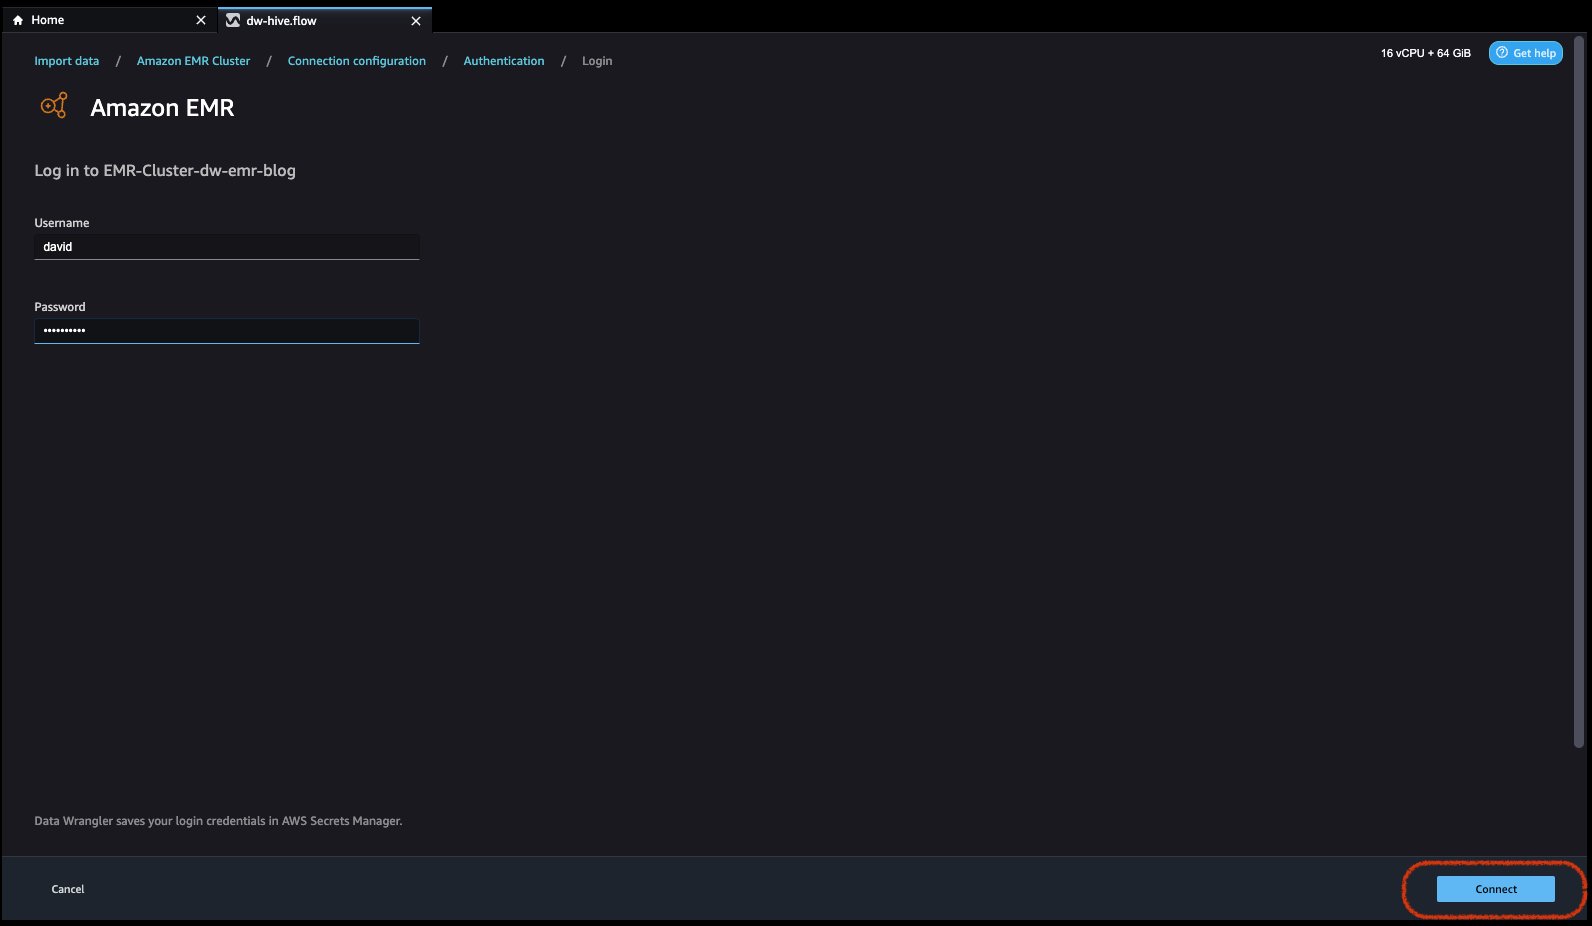
For Lightweight Directory Access Protocol (LDAP), select the option and click Next, login to cluster, then provide username and password to be authenticated and click Connect.
For No Authentication, you will be connected to EMR Hive without providing user credentials within VPC. Enter Data Wrangler’s SQL explorer page for EMR.
- Once connected, you can interactively view a database tree and table preview or schema. You can also query, explore, and visualize data from EMR. For preview, you would see a limit of 100 records by default. Once you provide a SQL statement in the query editor box and click the Run button, the query will be executed on EMR’s Hive engine to preview the data.


The Cancel query button allows ongoing queries to be canceled if they are taking an unusually long time.
- The last step is to import. Once you are ready with the queried data, you have options to update the sampling settings for the data selection according to the sampling type (FirstK, Random, or Stratified) and sampling size for importing data into Data Wrangler.
Click Import. The prepare page will be loaded, allowing you to add various transformations and essential analysis to the dataset.
- Navigate to Data flow from the top screen and add more steps to the flow as needed for transformations and analysis. You can run a data insight report to identify data quality issues and get recommendations to fix those issues. Let’s look at some example transforms.
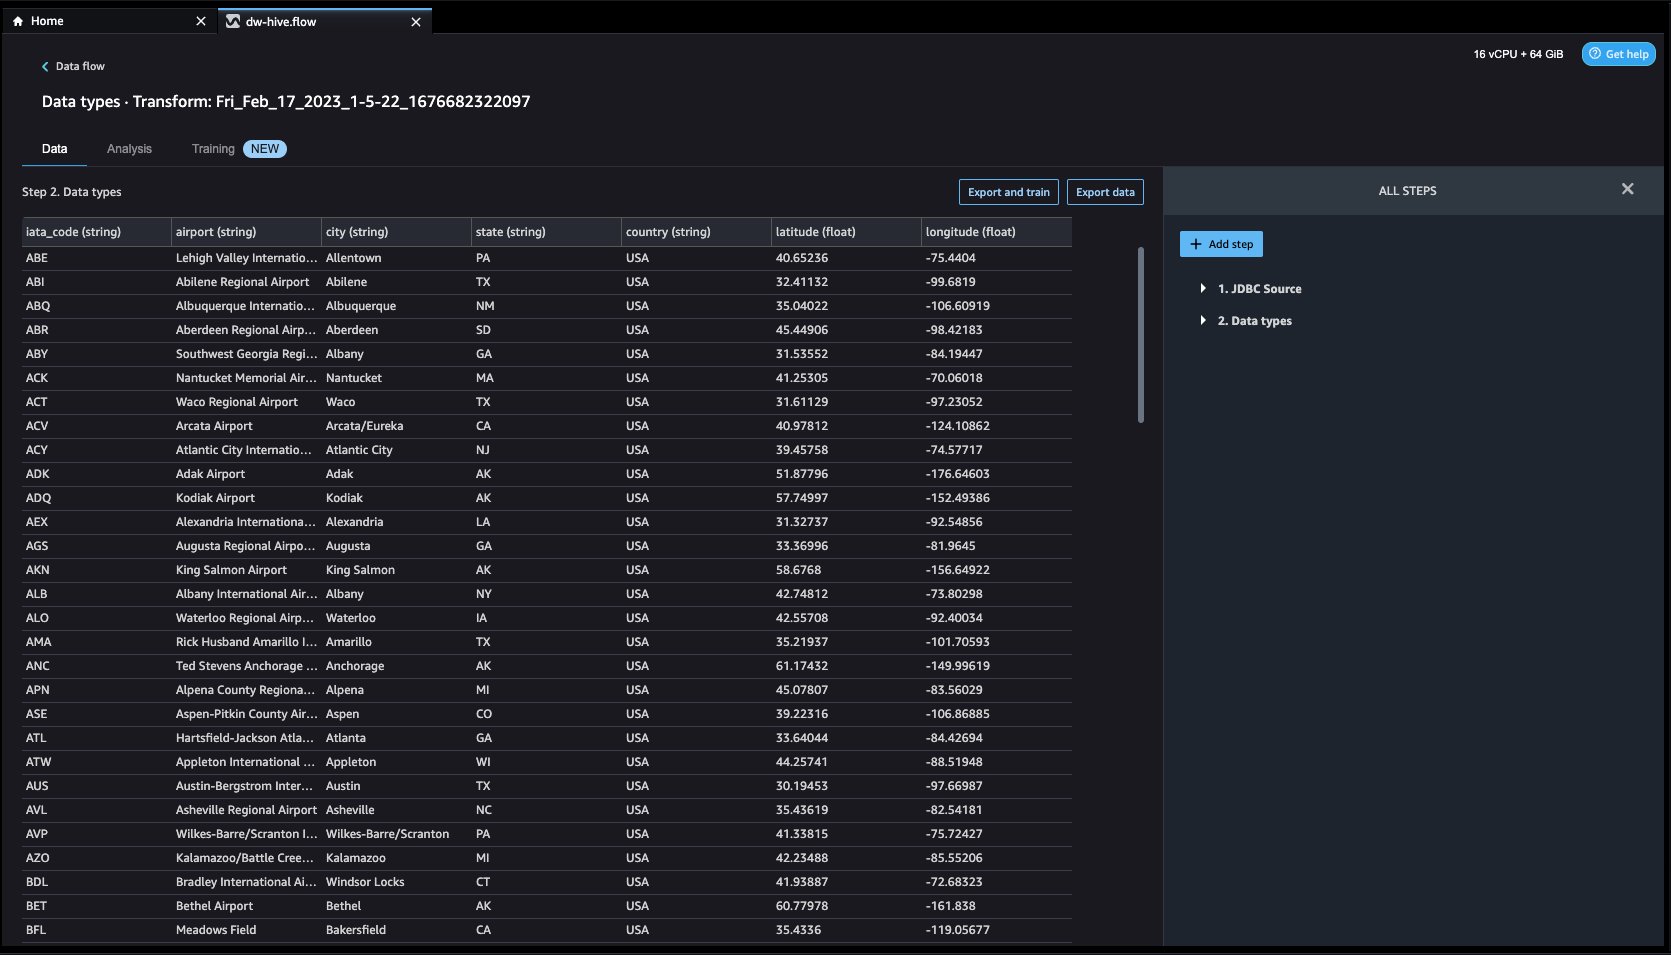
- In the Data flow view, you should see that we are using EMR as a data source using the Hive connector.

- Let’s click on the + button to the right of Data types and select Add transform. When you do that, you will go back to the Data view.


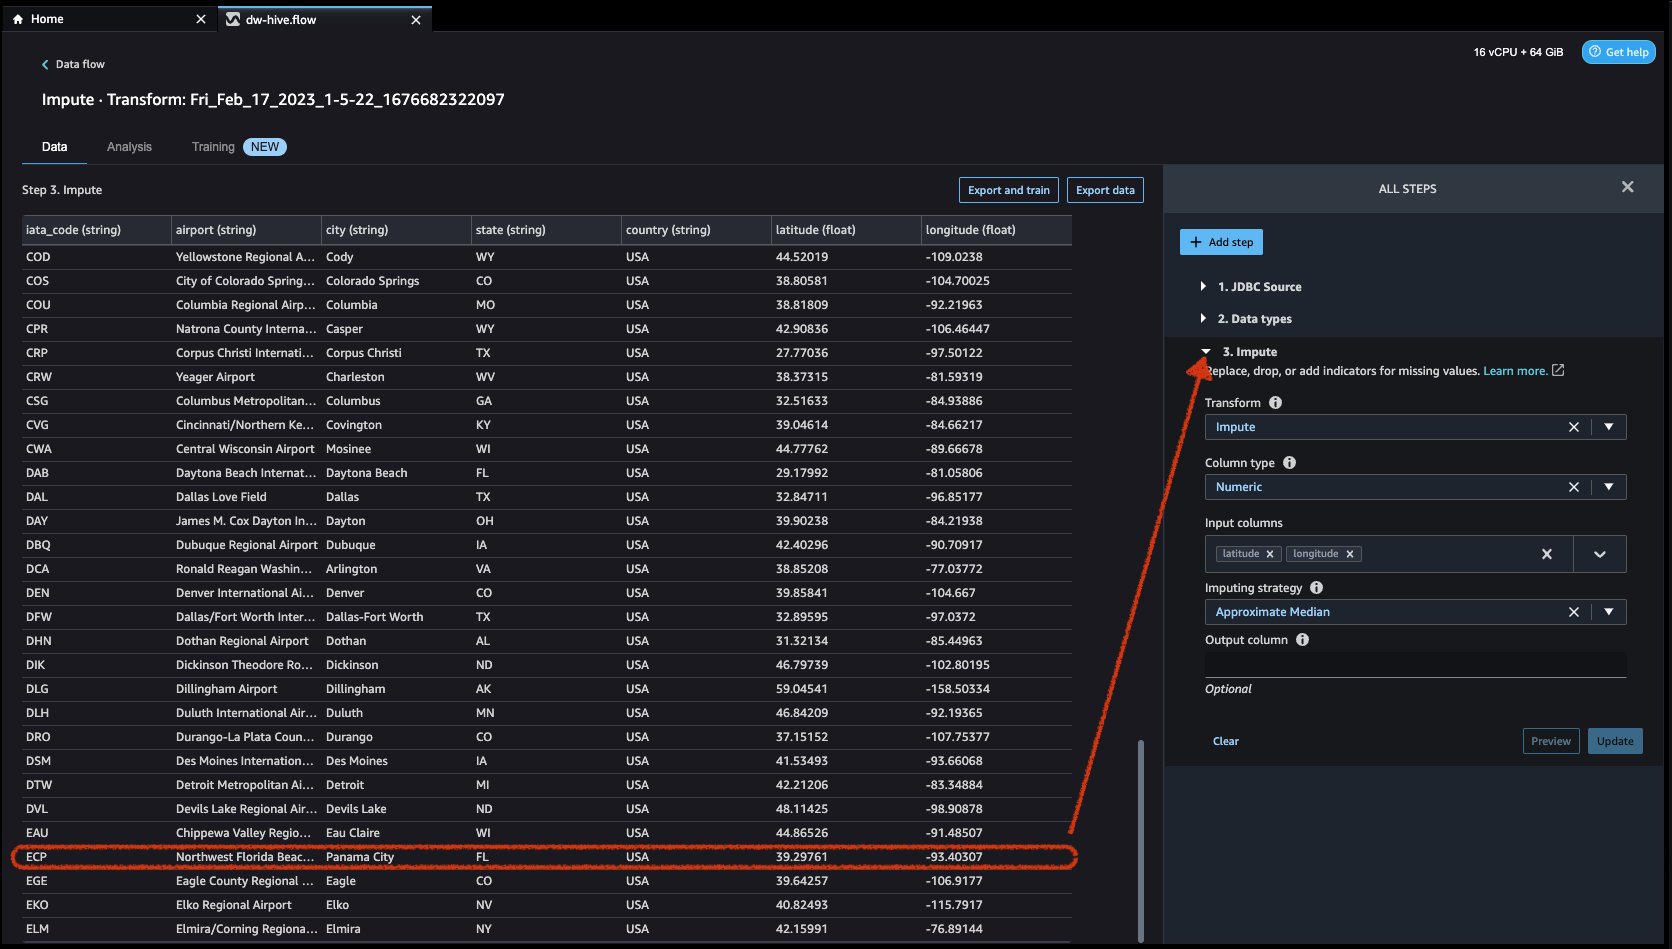
Let’s explore the data. We see that it has multiple features such as iata_code, airport, city, state, country, latitude, and longitude. We can see that the entire dataset is based in one country, which is the US, and there are missing values in latitude and longitude. Missing data can cause bias in the estimation of parameters, and it can reduce the representativeness of the samples, so we need to perform some imputation and handle missing values in our dataset.

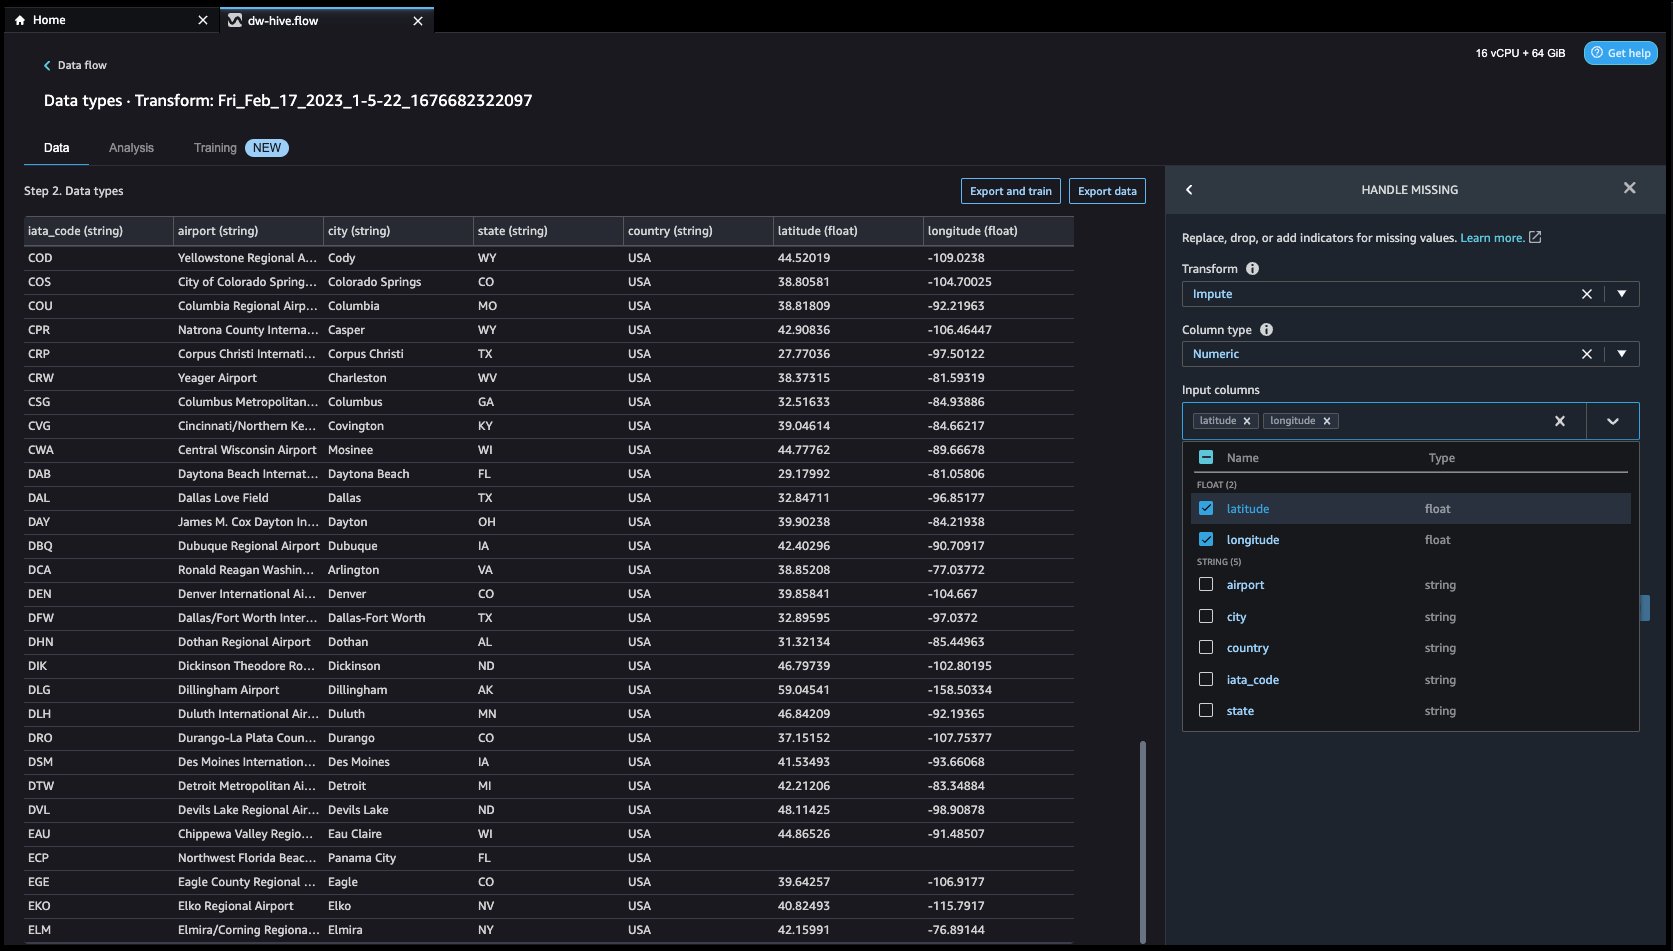
- Let’s click on the Add Step button on the navigation bar to the right. Select Handle missing. The configurations can be seen in the following screenshots.
Under Transform, select Impute. Select the Column type as Numeric and Input column names latitude and longitude. We will be imputing the missing values using an approximate median value.
First click on Preview to view the missing value and then click on update to add the transform.
- Let us now look at another example transform. When building an ML model, columns are removed if they are redundant or don’t help your model. The most common way to remove a column is to drop it. In our dataset, the feature country can be dropped since the dataset is specifically for US airport data. To manage columns, click on the Add step button on the navigation bar to the right and select Manage columns. The configurations can be seen in the following screenshots. Under Transform, select Drop column, and under Columns to drop, select country.


- Click on Preview and then Update to drop the column.

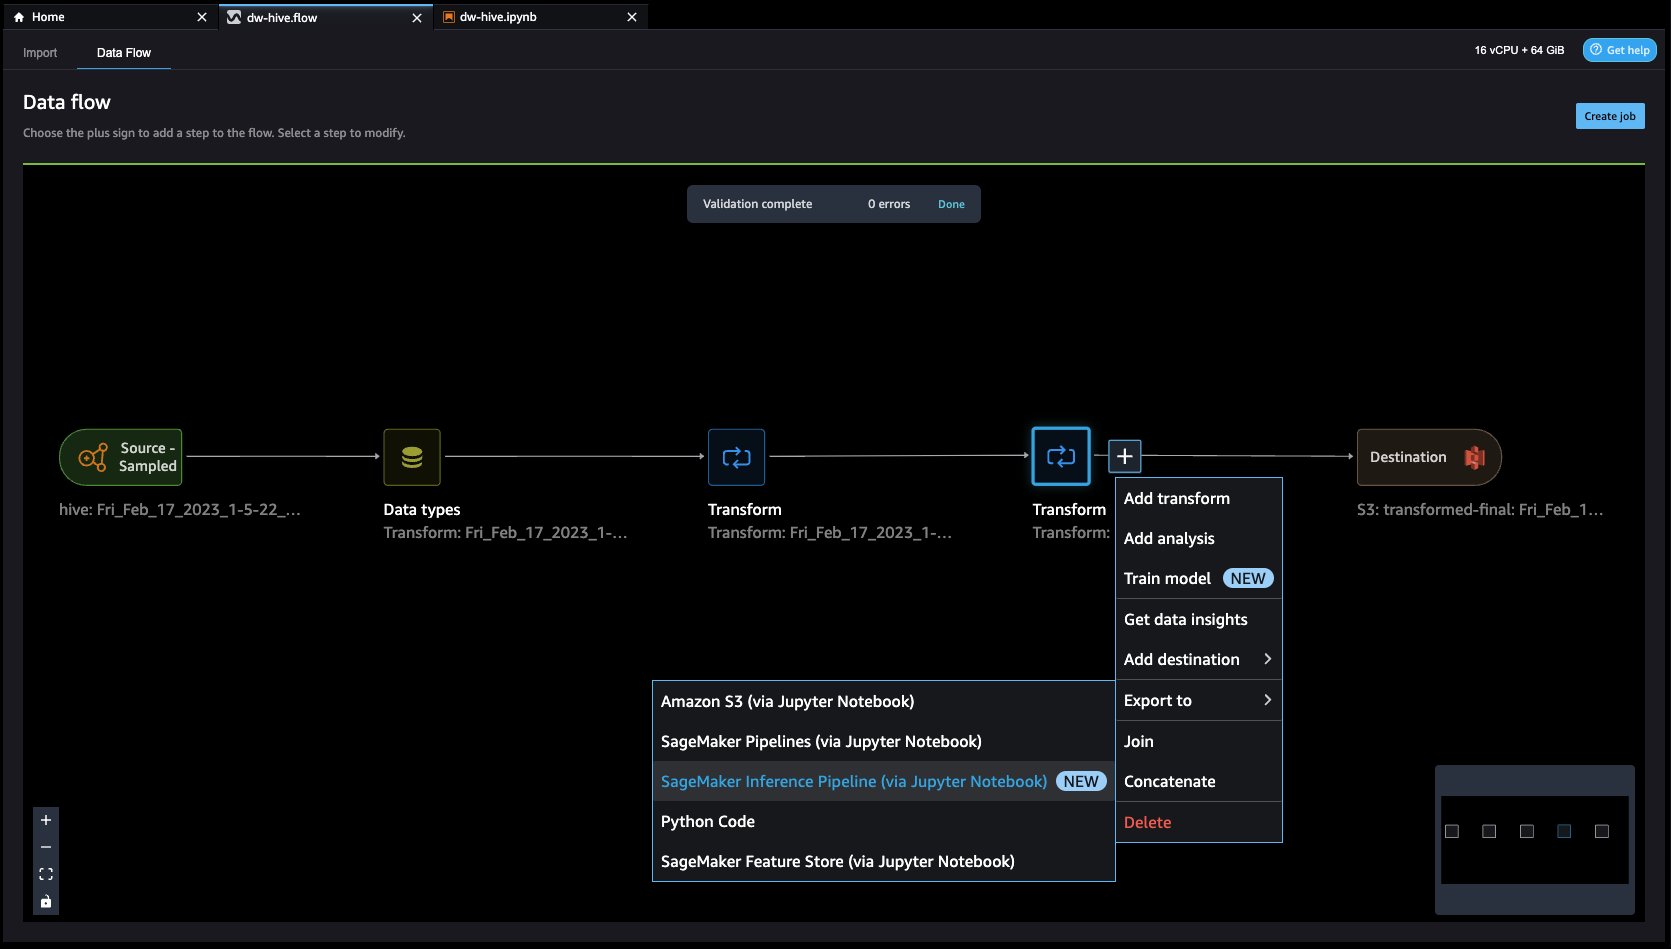
- Feature Store is a repository to store, share, and manage features for ML models. Let’s click on the + button to the right of Drop column. Select Export to and choose SageMaker Feature Store (via Jupyter notebook).

- By selecting SageMaker Feature Store as the destination, you can save the features into an existing feature group or create a new one.


We have now created features with Data Wrangler and easily stored those features in Feature Store. We showed an example workflow for feature engineering in the Data Wrangler UI. Then we saved those features into Feature Store directly from Data Wrangler by creating a new feature group. Finally, we ran a processing job to ingest those features into Feature Store. Data Wrangler and Feature Store together helped us build automatic and repeatable processes to streamline our data preparation tasks with minimum coding required. Data Wrangler also provides us flexibility to automate the same data preparation flow using scheduled jobs. We can also automatically train and deploy models using SageMaker Autopilot from Data Wrangler’s visual interface, or create training or feature engineering pipeline with SageMaker Pipelines (via Jupyter Notebook) and deploy to the inference endpoint with SageMaker inference pipeline (via Jupyter Notebook).
Clean up
If your work with Data Wrangler is complete, the following steps will help you delete the resources created to avoid incurring additional fees.
- Shut down SageMaker Studio.
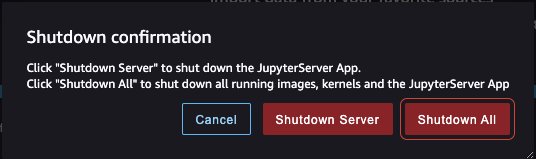
From within SageMaker Studio, close all the tabs, then select File then Shut Down. Once prompted select Shutdown All.

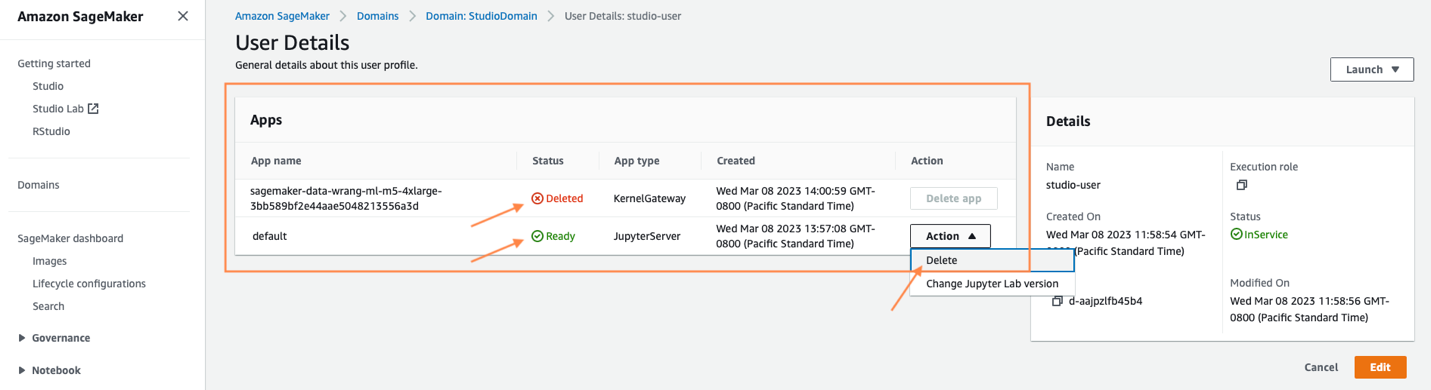
Shutdown might take a few minutes based on the instance type. Make sure all the apps associated with the user profile got deleted. If they were not deleted, manually delete the app associated under user profile.
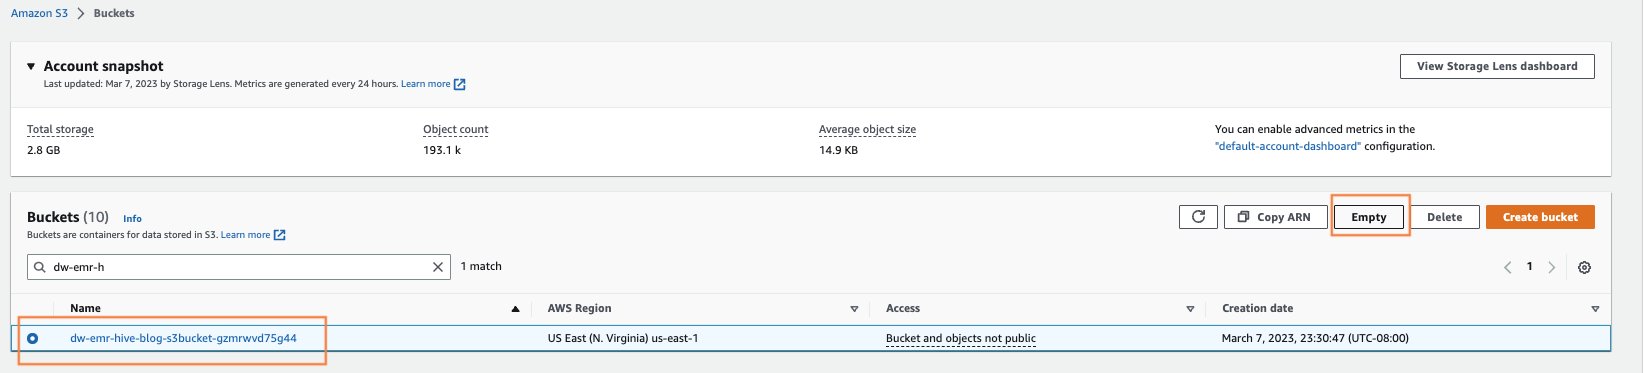
- Empty any S3 buckets that were created from CloudFormation launch.
Open the Amazon S3 page by searching for S3 in the AWS console search. Empty any S3 buckets that were created when provisioning clusters. The bucket would be of format dw-emr-hive-blog-.
- Delete the SageMaker Studio EFS.
Open the EFS page by searching for EFS in the AWS console search.
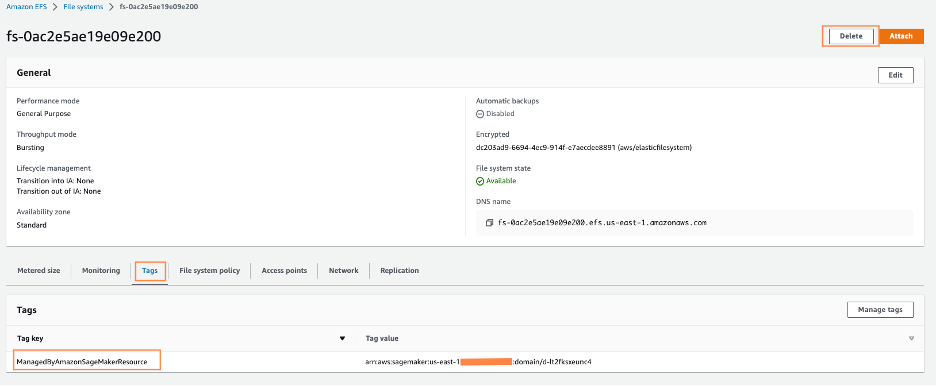
Locate the filesystem that was created by SageMaker. You can confirm this by clicking on the File system ID and confirming the tag ManagedByAmazonSageMakerResource on the Tags tab.
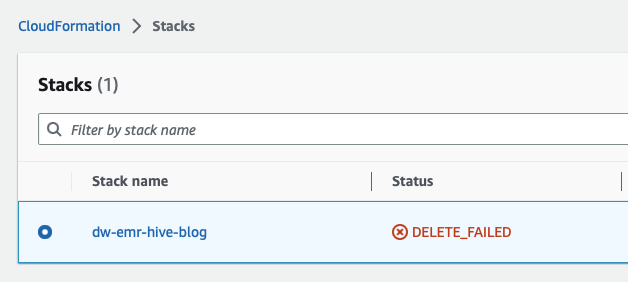
- Delete the CloudFormation stacks. Open CloudFormation by searching for and opening the CloudFormation service from the AWS console.
Select the template starting with dw- as shown in the following screen and delete the stack as shown by clicking on the Delete button.

This is expected and we will come back to this and clean it up in the subsequent steps.
- Delete the VPC after the CloudFormation stack fails to complete. First open VPC from the AWS console.
- Next, identify the VPC that was created by the SageMaker Studio CloudFormation, titled
dw-emr-, and then follow the prompts to delete the VPC.

- Delete the CloudFormation stack.

Return to CloudFormation and retry the stack deletion for dw-emr-hive-blog.
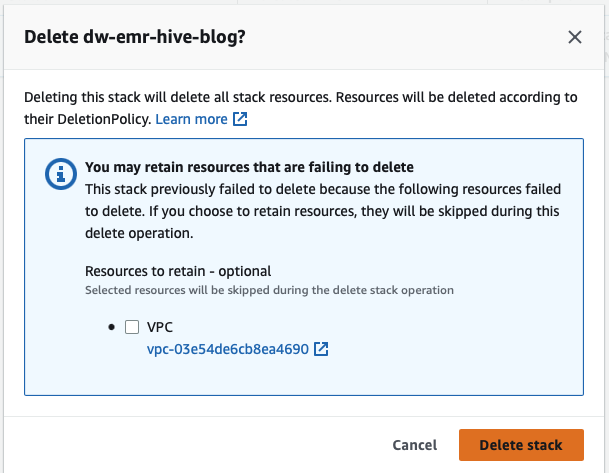
Complete! All the resources provisioned by the CloudFormation template described in this blog post will now be removed from your account.
Conclusion
In this post, we went over how to set up Amazon EMR as a data source in Data Wrangler, how to transform and analyze a dataset, and how to export the results to a data flow for use in a Jupyter notebook. After visualizing our dataset using Data Wrangler’s built-in analytical features, we further enhanced our data flow. The fact that we created a data preparation pipeline without writing a single line of code is significant.
To get started with Data Wrangler, see Prepare ML Data with Amazon SageMaker Data Wrangler and see the latest information on the Data Wrangler product page and AWS technical documents.
About the Authors
 Ajjay Govindaram is a Senior Solutions Architect at AWS. He works with strategic customers who are using AI/ML to solve complex business problems. His experience lies in providing technical direction as well as design assistance for modest to large-scale AI/ML application deployments. His knowledge ranges from application architecture to big data, analytics, and machine learning. He enjoys listening to music while resting, experiencing the outdoors, and spending time with his loved ones.
 Isha Dua is a Senior Solutions Architect based in the San Francisco Bay Area. She helps AWS enterprise customers grow by understanding their goals and challenges, and guides them on how they can architect their applications in a cloud-native manner while ensuring resilience and scalability. She’s passionate about machine learning technologies and environmental sustainability.
 Varun Mehta is a Solutions Architect at AWS. He is passionate about helping customers build Enterprise-Scale Well-Architected solutions on the AWS Cloud. He works with strategic customers who are using AI/ML to solve complex business problems.